Showing posts with label shellac. Show all posts

Monday, October 1, 2012

All the little plates

These are all the little square plates I have been making and experimenting with the shellac resist and terra sig. There were a few fuggly ones in there, but a few really nice ones too.
Here are 6 that I really like:

Has a Tim Burton vibe I think
Love it
Love it
The octopus plate was sold pretty much the second it came out of the kiln, so this is probably the only pic I will have of it. I will have to do more mollusks....
Here are a few other things that I have had on the go for a while and are now ready for the bisque:
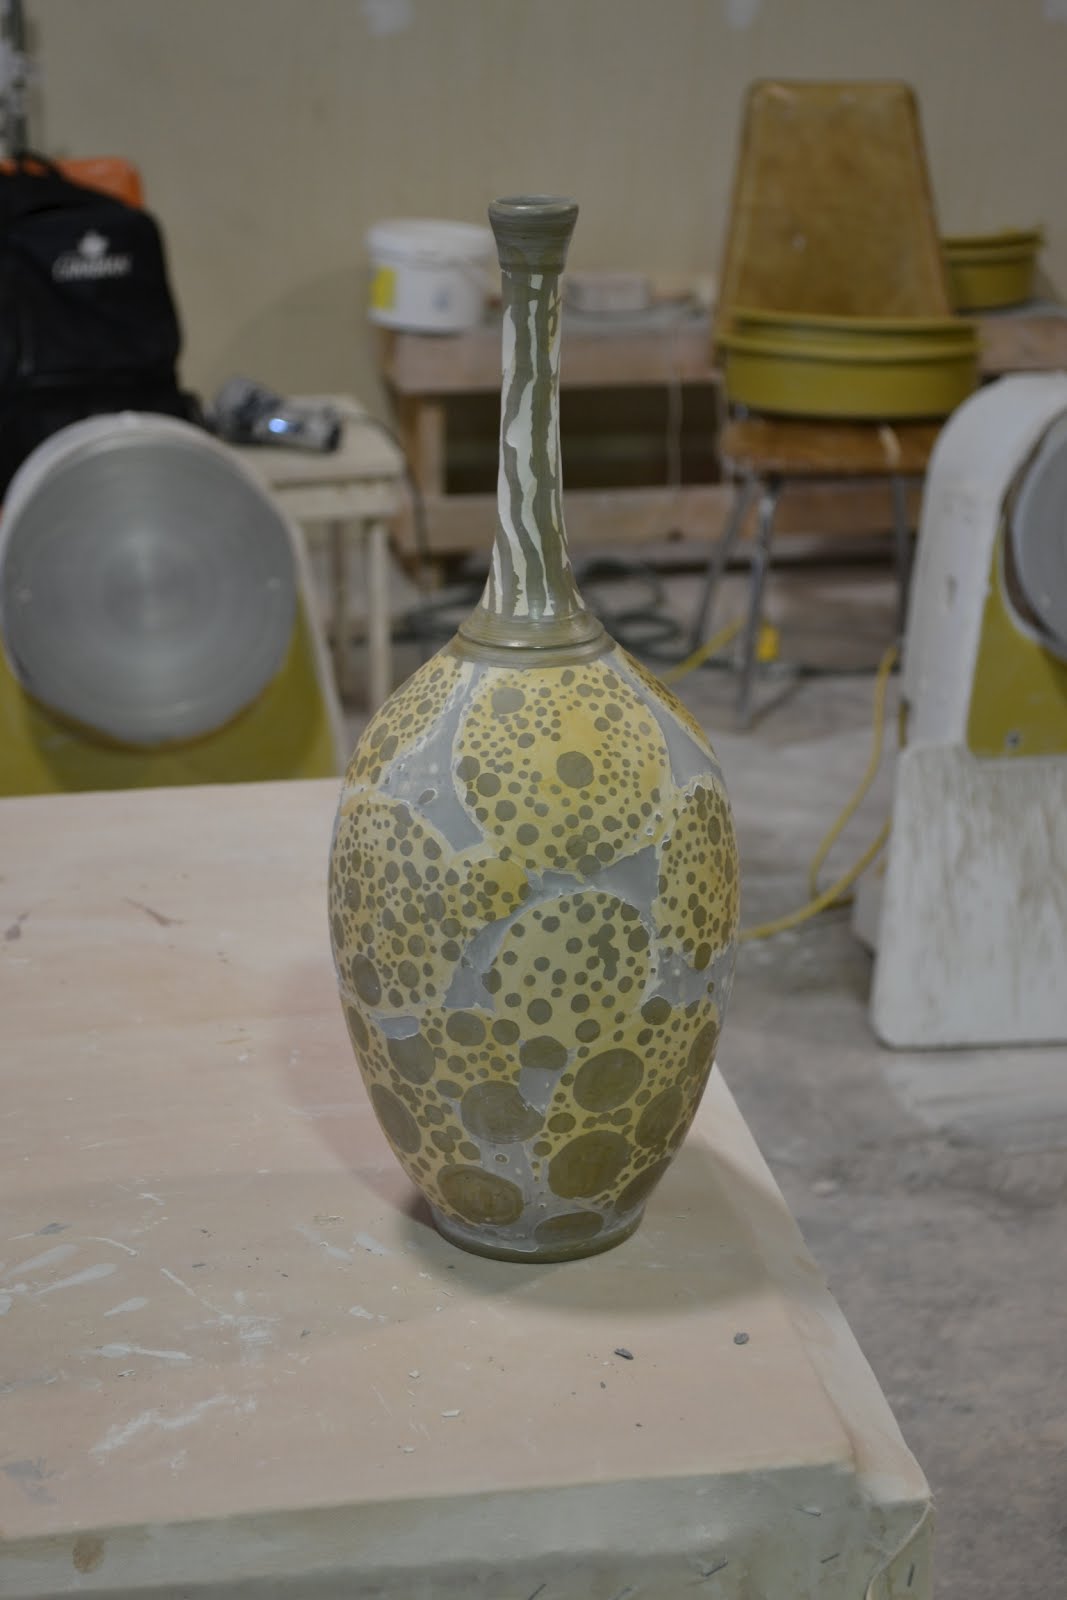
I was going a bit dotty by the end of this one
same with this one...
I was working on this bowl while listening to a CBC show that was talking about Glen Gould. While I was shellacking the pattern, they were playing one of his quicker pieces and I think I was flying along with Gould at the same time. The person doing the show said he thought that Gould had "left the stratosphere".

Friday, September 21, 2012

Fancy Legs


The women in my immediate family (my mum, sister and myself) suffer from what my mum has always termed “antsy legs”. The pharmaceutical industry has now termed it “restless leg syndrome”. I guess to be able to charge money for a new drug. Anyway, for a while now, we have been calling this irritating problem “fancy legs”. My sister was talking about her antsy leg to a friend, who had no idea what she was talking about and misunderstood and thought she was saying that she had “fancy legs”. So there ya go.

Long story short, I was unable to get to sleep for a while last night due to this problem. I also love to self diagnose myself via the internet. I have had localized muscle pain in my left buttock, and I think it is Piniformis Syndrom. The piniformis muscle is rubbing against the sciatic nerve due to pelvic torsion caused by a car accident 10 years ago. I think this is also exacerbating the fancy leg problem. I went to the massage therapist a couple of weeks ago and she worked a miracle (albeit only temporary). However, that night, the fancy leg was quite extreme, so me thinks they are linked.   On the clay front, the kilns are now working again. The electrician was in to diagnose/fix them on Monday. They both had some relay issues. So tonight, I guess I will be loading what did not fire properly last week. I have some more plates to terra sig, and 2 very large bottles that I have already terra sig'd and now need shellacking. The new batch of sig is very good. I am getting a very high gloss on it after burnishing. The last batch seemed to haze up and never really got very shiny. It almost makes me want to pit fire them...

Monday, July 23, 2012

The last few days

I have actually been a bit more productive lately. I guess with the heat starting to become more bearable and less humidity in the air I have more energy. I was able to load a bisque on Friday night, in anticipation of being able to fire a glaze load this week, but the last element in the kiln that had not been replaced yet, finally shuffled off it's mortal coil (pun intended) last week, the element is on order, but did not arrive on Friday, so hopefully tomorrow (fingers crossed). I also threw a bunch of the square plates, and trimmed them up. They have all had the slip/shellac treatment and are now drying under wraps. There were a couple squared off teapots. They are actually quite round, but the bottom comes out quite square and then I cut out feet at each corner. I should record the process and post it one of these days. I also took a few pictures, and will take more, of finished work and posted to Etsy (see last post). I updated my facebook account finally. I think I was the last person in the FB universe to update the new (to me) settings. It seems I am an antisocial networker.

I glazed the fire bowl and am again, just waiting for the element so that I can fire it. My fingers are really crossed with this one as there are a few things that could go wrong, and as it is a custom piece, it is marked for death by that fact alone. I just have to take deep breaths and pray to the kiln gods. I should have made 2 to be on the safe side, but I did not.

Here are a few pics of some of the pots that went into the bisque, including some of the square shellacked plates with various designs. I am especially fond of the leaf pattern and have begun working more along that line. It takes way less time to do than the trees, as the spirals take a really steady hand and a lot of patience. I also like the 1 big spirally thing with the stripes running behind it. It kind of reminds me of a seedling just poking it's head out of the ground. Apparently I am thinking of all things natural and organic when I am doing these. I don't really start with anything particular in mind, but I always seem to end up with these kinds of designs.

Wednesday, June 20, 2012

A Potters Nightmare / Girl Interrupted

Sunday/Monday

As I mentioned in one of my last posts, I am in a bit of a time crunch to get some mugs finished that I have been commissioned to create. I backfilled all the handles on Friday and left them loosely covered over night until I could get back to them on Saturday after work. I left them uncovered in the sun on Saturday afternoon for about an hour and then put them uncovered on the plaster to hopefully wick out more moisture. On Sunday, I got to the studio bright and early (9am) & put the mugs outside to dry again for several hours. If a non potter were watching me, they probably wondered what the heck I was doing. Every half hour or so I would wander outside, pick a mug up and press the base of the mug against my cheek, shake my head and put it back down. This is the only method I know of to tell if there is any moisture left in the clay. If it is cold, it is probably still wet & my cheek is the body part I rely on to gague the level of dampness. I nervously began loading the bisque kiln at bout 2:00 and set it for a 2 hour delay and a 2 hour preheat, so it wouldn’t start until 4:00. I went home and that night I sweated bullets in my sleep worrying about the mugs. Could they have been a little too damp? Will the handles and bottoms get blown out by the moisture being boiled out too vigorously? All the worrying was for naught. I checked them on Monday, and all was well, now I am a couple days ahead of schedule. I was originally going to wait until Tuesday to fire the bisque, but now I can glaze instead and take my time to get that part right instead of rushing through it and then I can load on Friday night and unload Sunday. Even thought these are very simple mugs, I am really happy with how they have turned out so far. The handles are perfect (in my opinion). They are not too big, and not too small, they are juuust right. I also had a few shellacked pots in there that have the layer of coloured terra sig slip. I am eager to see how these come out in the glaze, especially since the process is rather time consuming. I want to know that going cross eyed from all the dots and squiggles was worth it. I am not 100% sure how they will end up glazed, but probably in the translucent Amber as I love the way it reacts with the rutile in the sig).

Tuesday
I taught my Tuesday class last night and the kiln was on from a firing that one of the other instructors had loaded and fired. It should have been done a long time before that. About a half hour into the class, the computer on the kiln started beeping indicating that it was not heating fast enough, and it shut off at 2140 F when it was trying to reach 2175 F. I have a sneaking suspicion that this load only reached cone 4. So that means that my load of mugs etc will not be fired in that kiln this weekend as I had planned. Now I will be madly glazing on Friday night in order to pack it all up and take it to Ceramics Canada on Saturday to load in their kiln. I got the feet waxed on the mugs and a few other pieces, so I’m a little bit ahead.


Wednesday, June 6, 2012

And another one before bed...

I must be crazy...


One before bed

I applied a black slip tonight and then spent the evening after I got home shellacking the pattern and dotting the dots then wiped back the slip to reveal the white clay underneath. Now to bed to dream of dots and swirls.

Thursday, March 29, 2012

More shellacky shellackery...

They say that imitation is the sincerest form of flattery…well I sure hope so. I have been working away on my shellacking and have found out quite a few things in the process. One, don’t be so impatient. The first few pieces I shellacked, I was so anxious to find out if it actually worked I may have begun the abrasion process a wee bit early. The shellac did feel like it dried really quickly and I even went to far as to dry them with a fan for a while, but once I started wiping them down with the wet sponge, I could definitely see a loss of detail as the shellac started to dissolve away with the clay. I did get some interesting results, but not enough depth to the texture. I was acting a bit like a kid on Christmas eve who could not wait to get into all the loot under the Christmas tree. I will admit that I have some experience with this as well, but no amount of subterfuge and precision re-taping on my part could ever fool my Mum. So after some so so results I managed to curb enthusiasm and wait it out. My last, and so far the best piece to date was a plain old tall cylindrical vase that I had coated in a purple/blue slip when still wet. I let it get bone dry and then waxed on my first initial design. I let it dry for 24 hours and then began abrading. Once I got enough depth and let it dry out. I brushed on my second coat of shellac, so that the first design was completely covered, as well as a little bit on the outside of the initial design. I waited another 24 hours, came back and wiped down again. After it was dry, I brushed on the last coat of shellac. I filled in most of the unshellacked spaces, leaving only the narrowest gap between the new coat and the previous coats. This time I waited 48 hours and then abraded again, this is where I was able to get the most depth as I wasn’t as worried about the shellac wearing off. Finally, once it had dried sufficiently, I brushed on a coat of black decorating slip that I had left over from a soda/salt firing I did at Medalta last February. It is a terra sig based slip with Mason 6600 black stain and rutile. I put on 2 coats for good measure and let it dry a bit then wiped down the shellacked areas, leaving the un shellacked areas black. When it was all said and done, it did appear very similar to Jim Gottuso’s pots, albeit the brushwork is not as precise and the decoration is definitely not as well thought out as Jim’s, but for a newbie, it was not bad. I also did the slip thing to some mugs I had previously shellacked, but used various other terra sig based decorating slips that were again left over from the soda/salt firing, but had different oxides added. There was a chrome green, a blue/green and a rutile slip. None of these have been glazed fired yet, but will post some in progress pics as soon as I get a chance to take the pictures. I have been a bit sheepish in posting them, as I would never want to be accused of copying someone else’s style, but I will just have to get over it. Like I said at the beginning, imitation is the sincerest form of flattery (I hope). In lieu of my bas relief pots in progress, here are some interesting little things I picked up at the studio the other day. Dave was cleaning house and had a collection of pots that he was giving away. They had actually been given to him as the original owner couldn’t sell them, and did not want to consign them to the midden heap for future archaeologists to dig up. Warning, they are very ‘70’s, so if you are easily offended by heavily reduced, dark brown groggy stoneware clay and iron spotted buttermilk glazes, please look away now ;) This little mug was made by Connie Westrom (now Connie Pike of Pike Studios), before she met/married Bob Pike I am assuming
And this slightly bigger mug is by Ed Drahanchuk
A wee little pitcher and matching sugar bowl, maker unknown...
Have a good one

Thursday, March 22, 2012

Choo Choo!

As you may or may not be aware, I have an app on my iphone that I use as my alarm clock (one of 3 alarms that I use). It uses the motion sensing ability of the phone to figure out when I am in deep, light or REM sleep and it can start to wake me up when I am in light sleep so that I don’t wake up groggy. As an added bonus, it tracks my sleep patterns and records any noises during the night. I got this app mostly for the alarm clock functions, but I knew that I talked in my sleep, so I thought it would be cool to see what I actually say. I was reviewing the recordings for Tuesday night, and there were some brief bursts of babble and half scentences, but about halfway through the night, I came up with “Ch, choo….choo, choo, choo.”. Sometimes I say the weirdest things. As usual, I don’t have any recollection of what was going on behind the eyelids that inspired the locomotive references. Perhaps I was on the Orient Express, or living out some deep seated desire to be a locomotive engineer? Who knows. I wish I could actually save these recordings to share with everyone, but this app does not have that ability. If I can figure out how to record my nightly monologues, I will post some.
On the pottery front, I went down to Cactus Arts to pick up some better brushes for this shellacking nonsense. Having never used shellac, not even to refinish furniture (I’m a water based refinisher), I did not know what kind of brush to use. I originally picked up really cheap natural bristle brushes (wrong, wrong, wrong). I have since Googled this topic and have found out that nylon brushes work best, as the denatured alcohol (a very polar solvent) will not affect the nylon bristles like a natural bristle brush. For $1.99 each, I picked up 8 brushes of various sizes and shapes and I think they may just work.

I have not used them with shellac yet and am anxious to try them out.

Tuesday, March 20, 2012

Wacky shellacky

Too late for words, but here are some pics of the 1st shellac attempt.

Here is one of the pots I tried out the shellac on...

Monday, March 19, 2012

I’m stuck in a sticky web of my own creation

In an attempt to make myself a little more crazy, I began the shellacking process on Sunday. As I mentioned in a not so past post, I have been drawn into the highly textural surfaces that Jim Gottuso creates on his pots. I wanted to “practice” on a few pots before I subject all of the mugs I have been working on to this process. So I took some bowls that have been kicking around and have yet to make it to bisque and began shellacking. I started the process at around 9:30 am on Sunday, and managed to get 3 bowls all finished by 3:30. 2 of them just had very random patterns that were more of a “how much can I scrub” test, and “how much detail can I get” test. The one I spent the most time on was what I was going to call my paisley pot, but after it was all said and done, it might be more of an embryo pot. I freehanded in pencil the initial paisley nuclei all over the pot and then filled them in with shellac. I was not sure how long it would take the shellac to dry/harden, and was quite surprised to find that it went from tacky to try in no time flat, but did put it in front of a fan just to be extra sure it was hard. I did find that if the shellac was not quite thick enough, it would erode with the scrubbing, so I tried to keep the scrubbing to the absolute minimum. I then repeated this process and outlined each paisley just a little bit more and then again eroded the un shellacked surface to reveal another step down. Repeated ad nauseum until it had a bit of a malachite look to it, except the central nucleus is a paisley, or in some of them, slightly embryonic…I ended up doing about 6 layers of shellac.
Previous to the shellac, I got to excited to wait to get the flakes and did a few mugs, but used the wax resist instead. It worked pretty well, but you need to use really, really, really cold water to help keep the wax from getting soft and wiping away too easily, so my hands would get really, really, really cold I could have used heavy rubber gloves, but that would have been too easy and would have required a little bit of forethought and planning.
In my impatience to get the shellacking started (I like the word shellacking), and then of course the interruption of my afternoon on Saturday by an Irish Leprechaun that required my ingesting 3 pints of Guinness, I did not get to the hardware store as planned to buy the requisite parts to fix my shower. This is however coming to a head pretty quickly. I was standing in scalding hot water and showering in relative tepid water with intermittent bursts of cold water this morning.

FFWD a couple hours...I went to Lowes and picked up what the dude said should work to replace the diverter (first mistake)
This is what he sold me


Maybe I should say that it was the second mistake. The dork that tiled the bathroom a few years ago managed to block the diverter in its hole with grout. I was able to chip it out but I had visions of having to rip out all the tile
Anyway, after I calmed down and got it out, this is what I found:


As you can see, the diverter stem is much longer than the new one. However I discovered what the real issue was anyway and luck would have it that in past plumbing adventures, I had a few spare o rings that thankfully fit the business end.

The broken o ring was actually stuffed in between the stem and the outer casing.

Looking forward to a 1st world shower tomorrow.

Monday, March 12, 2012

Relieving My Bas

I have been drawn into the seductive world of bas relief. Although I have been attracted to this decorative technique for some time, I have always managed to keep it at arms length for various reasons, but mostly because I am very impatient and I am pretty sure I don’t have OCD. For those of you who read Jim Gottuso’s blog Sofia’s Dad’s Pots, you will know of what I speak. I think he has pretty much written the book on using resists and hydro-abrasion (aka wiping with water) to achieve highly textured and detailed patterns on the surfaces on his pots.

I was first introduced to this decorative process in 2001, but the masking medium used was a liquid wax emulsion which does not lend itself well to the vigorous scrubbing required to achieve good depth. The wax emulsion starts to wear off as you scrub, so you will lose detail as well. I knew that shellac was a better method, but did not want to deal with the fumes from commercially prepared shellacs and varnishes, especially in a communal studio space. Plus, as I had not been enamored with the results with the wax, so it did not really stick in my brain.

A few years ago, I discovered Jim’s pots via random internet searches on pottery. I was blown away by the detail he was able to achieve. I found his blog in 2010 and L’dMAO reading about his experiments with shellac, the trials and tribulations of using a respirator, and the questioning looks he had when asking where he could buy 100 % alcohol to try cutting his own flakes.

FFW’d to a couple of weeks ago. I was working at Ceramics Canada, talking to a customer (also a past Fairview student) about what she was up to now, and she whipped out her phone to show me a picture of the latest greatest thing she was doing….you guessed it, she had been relieving her bas and was using shellac as the resist. I thought, man, I know I could do this; she is just as easily distracted by shiny objects as me, perhaps more so. In an attempt to get at it as soon as possible, I went off to the studio and as I am both lazy and impatient, I decided to use the wax resist on a few mugs, just to experiment with and get my brain working on patterns etc. So far the results have been ok, it just requires a little patience, and really cold water. I find the cold water helps keep the wax hard. I was also not sure about where to get shellac flakes. I did not want to mess around with stinky commercial varnishes. I have found them at Lee Valley, and will be off tonight to pick up a small bag, and then I will need to find a source of denatured alcohol, I am guessing the drug store?